
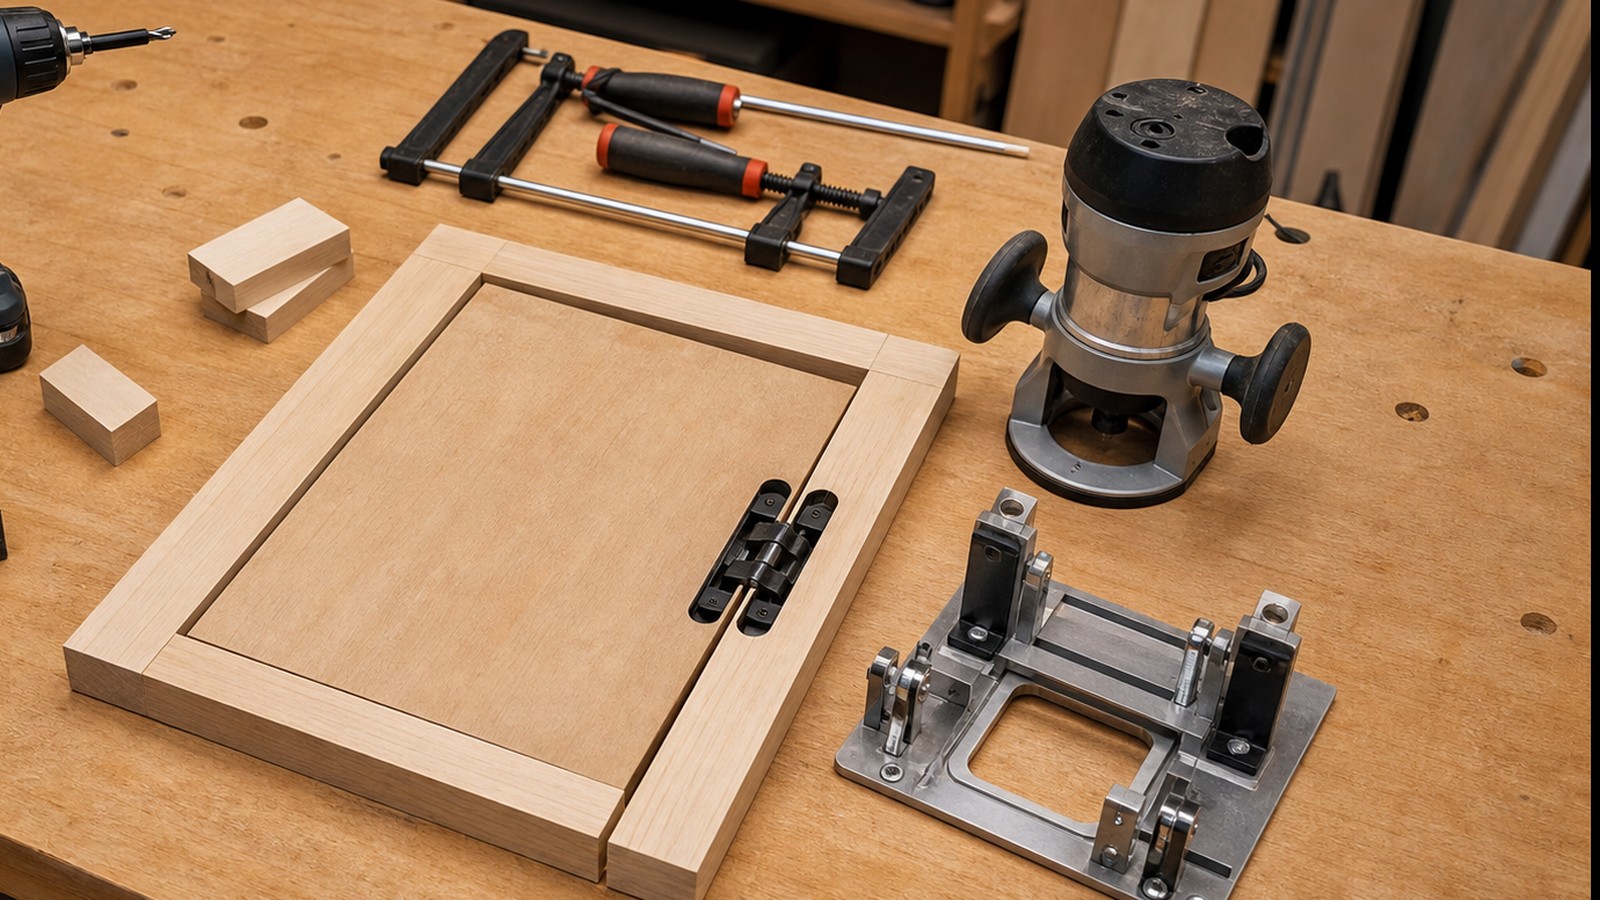
The Right Tools Make Concealment Look Intentional
The tools you need for concealed door projects are mostly the tools that help you measure accurately, cut straight, fasten securely, and adjust patiently. Hidden doors do not require a secret workshop full of exotic equipment, but they are unforgiving of sloppy layout. A tiny hinge error, wandering saw cut, crooked jamb, or rushed finish can make the door obvious before anyone touches it. The best toolkit supports precision at every stage: planning the opening, building the moving panel, anchoring hardware, tuning reveals, and finishing the surface so the door belongs to the room.
A: Not always; accurate measuring, clean cutting, and careful fastening matter most.
A: No, but a guided straight cut helps with large panels.
A: A hinge jig or self-centering bit can prevent many alignment problems.
A: No, load-bearing hardware needs appropriate screws or bolts into structure.
A: They can be, if you use guides, shallow passes, and scrap practice.
A: Spacer blocks make repeated reveal widths easier to maintain.
A: Only if the surface area and finish quality justify the setup and cleanup.
A: Dust protection is often skipped during sanding and routing.
A: Usually more than expected; clamps replace rushed hands during assembly.
A: Repeated dry fitting catches errors before they become visible.
Start With Measuring Tools You Trust
A reliable tape measure, folding rule, combination square, framing square, level, and straightedge are the foundation of the project. Concealed doors depend on relationships between the door, jamb, trim, wall plane, and floor. If those measurements drift, the disguise drifts with them.
Use the same tape measure throughout a project when possible. Small differences between tapes can create annoying mistakes, especially when you are transferring reveal widths or hinge locations from one part to another.
A story pole can also help. Mark key heights on one scrap board so you are not remeasuring every shelf, rail, hinge, and trim line from scratch.
Layout Tools Prevent Expensive Guessing
Blue tape, a sharp pencil, marking knife, chalk line, spacer blocks, and templates let you preview the door before cutting. Layout is where many hidden-door problems are solved cheaply. A taped swing arc can show a collision long before hardware arrives.
Saws Should Match the Material
A circular saw with a guide track, miter saw, table saw, jigsaw, oscillating multi-tool, or handsaw may all appear in a concealed door project. The right choice depends on whether you are cutting sheet goods, trim, casing, flooring, or small blocking. Accuracy matters more than owning every saw.
Use fine-tooth blades for visible cuts and support material to reduce tear-out. A concealed door often has long edges that sit near eye level, so rough cuts can become visual giveaways. Clean cuts save time during filling and finishing.
Drills and Drivers Do Daily Work
A drill, impact driver, countersink bit, self-centering hinge bit, driver bits, and quality fasteners handle much of the assembly. Pre-drilling is especially important near edges and hardwood trim. Split material weakens the project and makes final alignment harder.
Keep spare bits nearby. Dull bits wander, burn, and tempt you to push too hard. Concealed hardware rewards controlled drilling more than force.
A right-angle drill attachment can help inside narrow openings, bookcase backs, or tight hinge pockets where a full drill body will not fit.
Clamps Are Quietly Essential
Clamps hold parts in alignment while glue sets, fasteners go in, or hardware is tested. Bar clamps, quick clamps, corner clamps, and temporary blocks can all help. Many DIY mistakes happen because one person tries to hold, align, and fasten a moving piece at the same time.
Hinge Jigs Improve Repeatability
Concealed hinges, pivot plates, and heavy-duty hinges need accurate placement. A hinge jig, router template, drilling guide, or shop-made spacer can keep matching parts consistent. This is not about speed; it is about making the second cut match the first.
If you are using specialty hardware, read the instructions before buying tools. Some systems need specific bit sizes, mortise depths, or floor drilling. Knowing that early prevents a half-installed door from waiting on a missing tool.
Routers Help With Clean Recesses
A trim router or plunge router can cut hinge mortises, shallow recesses, grooves, and panel details. Routers are useful when the concealed door needs hardware to sit flush or when trim lines must be crisp. Use guides, stops, and test cuts on scrap before touching the final door.
Dust control matters with routing. Fine dust can hide pencil lines, affect finishes, and make the workspace unpleasant. A vacuum attachment and eye protection are not optional luxuries.
For beginners, shallow passes are safer and cleaner than trying to remove everything at once. Patience produces better edges.
Fastening Tools Need Structural Judgment
A nailer can speed trim work, but hidden-door hardware should rely on appropriate screws, bolts, blocking, and framing connections. Decorative fasteners and structural fasteners have different jobs. Treat them accordingly.
Sanding and Filling Tools Sell the Surface
Sanders, sanding blocks, files, wood filler, caulk, putty knives, and scrapers help the visible surface disappear into the room. Concealed doors are often judged from a few feet away, where uneven seams, proud fasteners, and rough edges catch light.
Do not overfill operating seams. Caulk fixed trim joints, fill nail holes, and smooth panels, but keep moving gaps free. A beautiful caulk line across an operating joint will crack the first time the door opens.
Painting Tools Control the Final Read
Quality brushes, rollers, sprayers, masking tape, drop cloths, and finish samples make the final disguise believable. Matching sheen can be as important as matching color. A satin door set into matte wall panels may announce itself even if the color is technically close.
Test finishes under the room’s real lighting. Daylight, warm bulbs, and grazing light can reveal different flaws. Concealment depends on how the door looks where it lives, not under perfect workshop conditions.
Let finishes cure before heavy use. Fresh paint can stick at tight reveals and damage the edge you worked to hide.
Safety Gear Belongs in the Core Kit
Eye protection, hearing protection, dust masks or respirators, gloves used appropriately, push sticks, stable ladders, and good lighting belong in the core toolkit. Concealed door projects combine cabinetry, trim, door hardware, and sometimes framing, so the work changes risk profiles throughout the day.
Specialty Tools Are Worth Renting Selectively
You may not need to own a track saw, laser level, biscuit joiner, pocket-hole machine, router table, or finish sprayer. Renting or borrowing can make sense for one demanding phase. Spend money where it improves accuracy, safety, or finish quality.
A hidden door is not better because the tool list is longer. It is better when every tool supports a clear operation. Buy the basics, borrow specialized help when needed, and practice on scrap before the final cut.
The Most Important Tool Is a Test Fit
No tool replaces repeated dry fitting. Assemble, hang, check, remove, trim, adjust, and test again. Concealed doors need small corrections, and test fitting is how you find them while they are still small.
That habit is what separates a polished project from a frustrating one. The tools help, but the process matters more: measure carefully, cut deliberately, fasten into structure, finish patiently, and never assume the door works until it has been opened, closed, loaded, and inspected in place.
With that mindset, a modest toolkit can produce a hidden door that looks intentional instead of improvised.
Organize Tools by Project Phase
A concealed door project becomes less overwhelming when the tools are grouped by phase. Measuring and layout tools come first, then cutting tools, then fastening and assembly tools, then finishing supplies. Keeping those phases separate helps you avoid jumping into irreversible cuts before the layout has been tested.
This organization also reduces mistakes. If your router, hinge jig, and screws are on the bench before the opening has been checked for square, the project can start to feel further along than it really is.
Use Scrap as a Training Surface
Scrap material is one of the most valuable tools in the shop. Practice hinge mortises, paint samples, wallpaper cuts, trim returns, and latch recesses before trying them on the actual hidden door. The goal is to make your first mistake somewhere disposable.
Build Temporary Supports for Heavy Work
Temporary supports can make the difference between a careful installation and a strained one. Blocks, wedges, door jacks, saw horses, and simple cleats hold parts where they belong while you fasten them. They also protect fingers and finished edges when the door is too awkward to hold by hand.
Even light concealed doors benefit from support during adjustment. A door that sags while screws are started can lock a mistake into the hinge position. Supporting the weight lets the hardware go in under controlled conditions.
Many supports can be made from leftover lumber. They do not have to be beautiful; they have to be stable, predictable, and easy to remove.
Do Not Let Tool Ownership Drive the Design
It is tempting to design around the newest tool in the garage, but concealed doors should be designed around the room and opening. A router can add panel details, a sprayer can produce a smooth finish, and a laser can speed alignment, but none of those tools should create a disguise that feels wrong for the house.
Choose the design first, then decide which tools help execute it cleanly. That order keeps the finished door from looking like a tool demonstration.
Keep Calibration in the Routine
Before critical cuts, check that squares are square, blades are clean, levels are trustworthy, and fences are aligned. Concealed-door work stacks small tolerances. A slightly inaccurate tool can become a visible gap after several operations.
Calibration is not glamorous, but it is faster than remaking a door. Hidden work looks effortless only when the setup work is deliberate.
Check consumables too. A dull blade, clogged sandpaper, cheap masking tape, or bent drill bit can make an otherwise careful tool setup behave poorly. Concealed door work often fails at the ordinary points, not the dramatic ones.
Good calibration also creates confidence. When the tools are known, you can focus on the room, the reveal, and the sequence of work instead of wondering whether the equipment is quietly introducing errors.
Choose Tools That Leave Room for Correction
Some tools remove material quickly, which is helpful only when the layout is certain. Beginners and occasional DIYers may get better results from slower methods that allow checking between steps. A hand plane, sanding block, sharp chisel, or guided saw can be more forgiving than a rushed power-tool pass.
This does not mean avoiding power tools. It means using them with stops, guides, and test pieces so mistakes stay controlled. Concealed door projects reward deliberate progress because the final surface has nowhere for errors to hide.
Keep the Jobsite Clean Enough to See Problems
Hidden-door work creates dust, offcuts, fasteners, packaging, and hardware pieces that can quickly cover the very lines you need to inspect. Sweep often and keep the operating area clear. A clean floor also helps you notice rubbing, dropped screws, and small finish chips before they become bigger problems.
Organization protects momentum. When the correct bit, hinge screw, spacer, or touch-up brush is easy to find, you are less likely to improvise with the wrong substitute.
The clean workspace is not about neatness for its own sake. It is another tool for accuracy. Concealed door projects often ask you to judge tiny gaps and faint shadows, and that judgment is much easier when the bench, floor, and opening are not competing for attention. A tidy setup also keeps delicate hardware from disappearing under sawdust.


