Why a Secret Door Is Easier Than Most People Think
A secret door sounds like something pulled from a mystery novel, a grand library, or a movie mansion with hidden passageways behind bookcases. But the easiest DIY secret door for beginners is far more practical than dramatic. It does not require a castle, a contractor, or a complicated mechanical system. In most homes, the simplest version is a disguised door that hides an ordinary opening behind a clean panel, bookshelf face, mirror, slat wall, or paint-matched surface. The key is choosing a design that works with your current skill level. Beginners should avoid heavy pivot doors, complicated cabinetry, motorized systems, or anything that requires major structural changes. The easiest path is usually a lightweight flush panel door, a shallow bookcase door, or a concealed closet-style door that uses reliable hardware and blends into the surrounding wall. When planned correctly, the project becomes less about secret-agent engineering and more about smart measuring, careful alignment, and clean finishing.
A: A lightweight flush panel door that matches the surrounding wall or trim is usually the easiest option.
A: Yes. Existing closet, pantry, and storage-room openings are the best places to start.
A: Not for a simple panel-style secret door, but careful measuring and patient alignment are important.
A: Lightweight plywood, a hollow-core slab, or thin decorative paneling can work well.
A: Use matching paint, repeated trim, wall molding, vertical slats, wallpaper, or shadow lines.
A: A bookshelf door is exciting, but it is heavier and harder than a simple flush panel door.
A: Push-to-open latches and magnetic catches are popular for handle-free beginner designs.
A: It needs enough even spacing to open smoothly without rubbing the frame, floor, or trim.
A: Yes, but beginners should make sure it can always be opened safely from inside.
A: Making the door too heavy before choosing hardware strong enough to support it.
The Best Beginner Secret Door Design
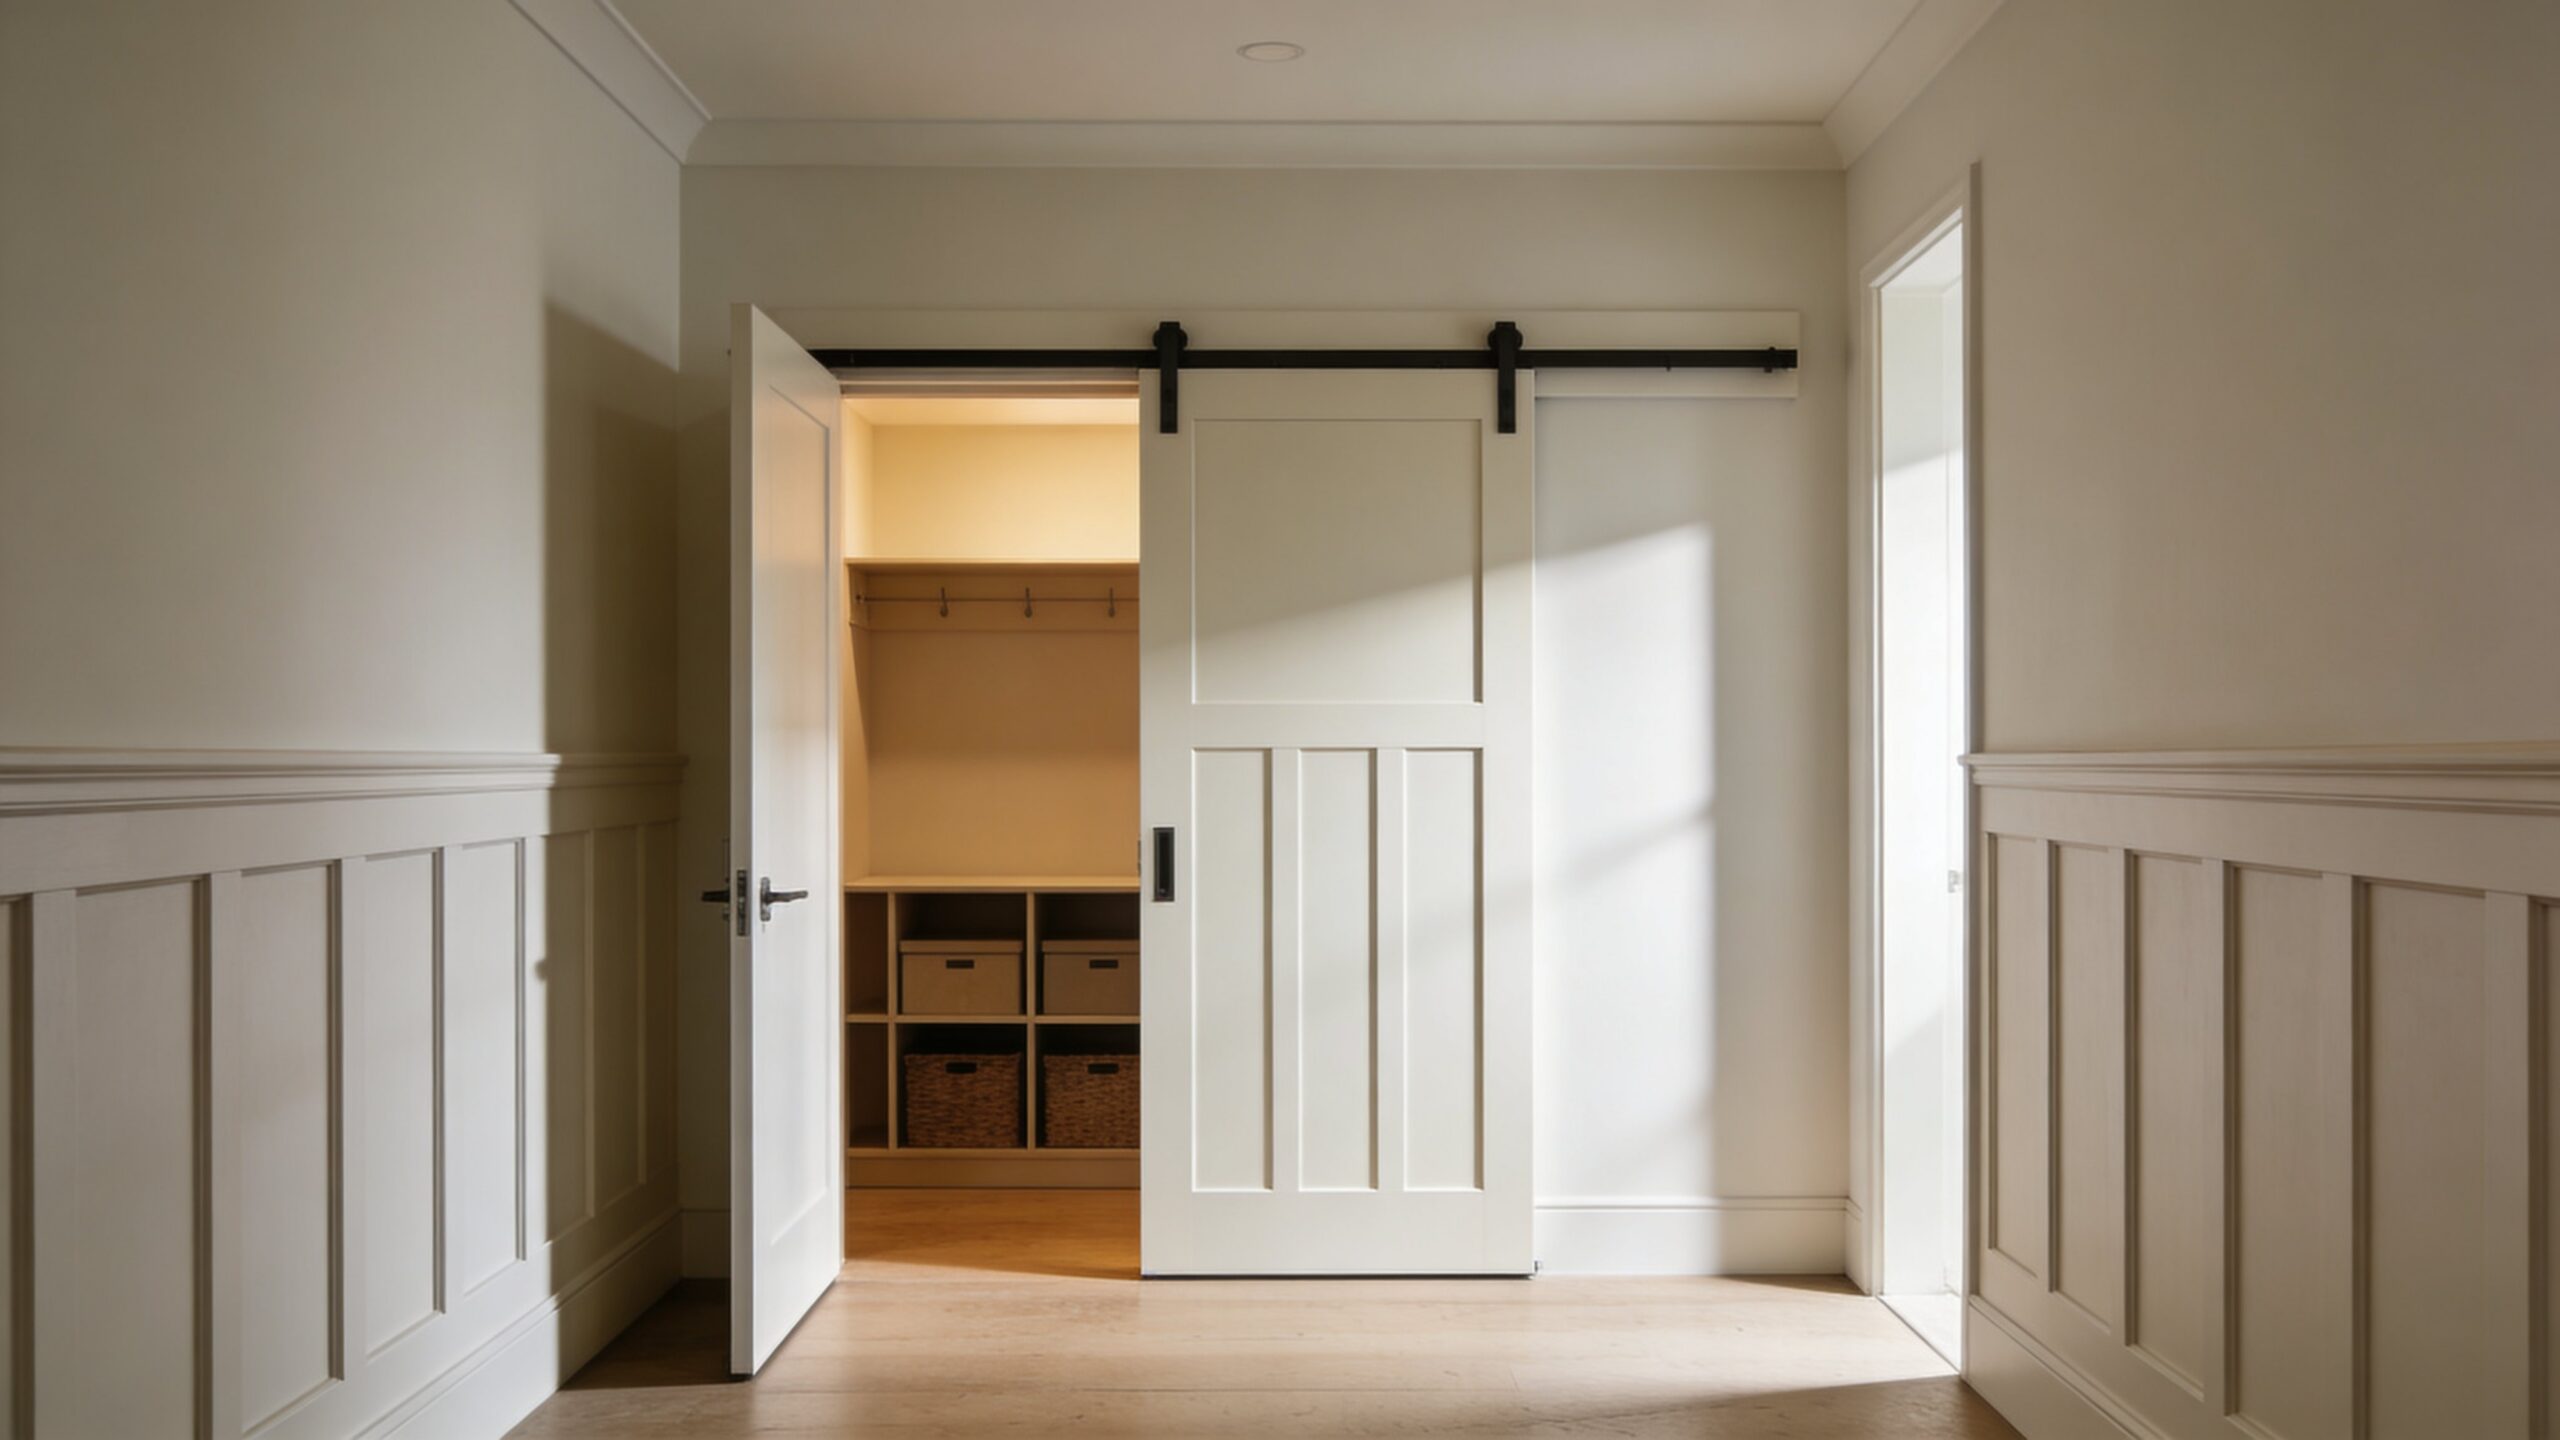
The easiest DIY secret door for beginners is usually a lightweight panel door that sits inside an existing doorway and is finished to match the wall around it. This design is simple because it uses a normal doorway, a manageable door slab or plywood panel, basic trim strategy, and accessible hardware. Instead of trying to create a perfect hidden room from scratch, you are disguising a door that already has a logical place to exist. A paint-matched panel is often the most beginner-friendly choice because it avoids complex shelves, heavy loads, and deep framing. The door can be made to look like a wall panel, vertical accent feature, beadboard section, wainscoting panel, or decorative millwork. If your home already has board-and-batten, shiplap, wall molding, or painted trim details, this style can hide surprisingly well. The secret comes from repetition. When the hidden door looks like one more section of the same wall treatment, the eye accepts it as part of the room.
Start With the Right Location
The best location for a beginner DIY secret door is an interior doorway that already leads to a closet, pantry, office, utility room, storage space, or small bonus room. These openings are usually easier to modify because they are not exterior doors, they do not require weatherproofing, and they typically do not need high-security hardware. A closet or pantry is especially forgiving because the door does not need to feel like a bank vault. It simply needs to open smoothly, close reliably, and blend into the room.
Avoid choosing a required exit, stairwell door, garage entry, or fire-rated doorway for your first project. Those areas may involve building codes, safety requirements, self-closing hinges, fire-rated assemblies, or special clearances. A beginner secret door should be fun, useful, and safe. If the doorway is essential for emergency exit, ventilation, access to mechanical equipment, or electrical panels, keep the design obvious enough that people can use it quickly when needed.
Choose a Simple Door Face
For beginners, the door face matters more than the hidden mechanism. A secret door succeeds when the visible surface looks intentional. The easiest surfaces are paint-matched panels, vertical wood slats, faux cabinet panels, mirror panels, or shallow shelving. Each option creates a reason for the door to exist visually, which helps disguise the reveal lines around it.
A painted wall-panel door is the lightest and simplest. A mirror door is also effective because reflections distract from seams. A slat-wall door can hide vertical gaps beautifully, but it requires more cutting and alignment. A shallow bookcase door is classic and exciting, but it adds weight, depth, and hardware demands. If this is your first secret door, choose the lightest design that gives you the look you want. The less weight you add, the easier the door will be to hang, align, adjust, and maintain.
Hardware That Makes the Project Beginner-Friendly
The easiest secret door hardware is not necessarily the most invisible hardware. Beginners should prioritize adjustability, weight rating, and smooth operation. Standard hinges can work if they are hidden by trim or paneling, but concealed hinges, Soss-style hinges, or heavy-duty cabinet-style hinges can create a cleaner illusion. For a flush panel door, adjustable concealed hinges are helpful because small corrections can make a big difference in the final reveal.
Touch latches and magnetic catches are popular because they remove the need for a visible knob. A push-to-open latch lets the door face stay clean, while a magnetic catch helps the door stay closed. However, the latch should never trap someone inside. If the secret door leads to a room people may enter, make sure it can be opened easily from both sides. A simple hidden pull, recessed grip, low-profile handle, or push latch with interior release is usually better than an overly clever mechanism.
Measure Before You Build
A beginner-friendly secret door depends on accurate measuring. Before buying materials, measure the doorway width, height, depth, wall thickness, swing direction, floor clearance, and surrounding trim. Check whether the floor is level and whether the existing door frame is square. Many older homes have openings that look straight but are slightly out of alignment. That does not mean the project will fail, but it does mean you should plan for adjustment. The most important measurement is clearance. A hidden door needs enough space to open without scraping the floor, rubbing the wall, or catching on trim. Leave consistent reveal gaps around the door so it can move freely. A tiny gap may look seamless, but if the door swells with humidity or shifts slightly, it can bind. For beginners, a clean and even reveal is better than an impossibly tight one. Paint, shadows, trim lines, and repeated wall patterns can hide a small gap more effectively than frustration can fix a door that will not open.
Build Light, Straight, and Strong
The easiest DIY secret door should be lightweight but stable. A hollow-core slab, lightweight plywood panel, or carefully framed thin door face can work well. The goal is to avoid unnecessary bulk. Heavy materials can sag, stress hinges, pull out screws, and make alignment difficult. If you want a decorative face, attach lightweight trim or thin paneling rather than thick lumber.
Straightness is just as important as strength. A warped panel will reveal itself quickly because the gaps around the door will be uneven. Choose flat materials, store them properly before installation, and use enough support to keep the door from twisting. If you are adding trim, slats, or molding, apply it evenly so the door does not become front-heavy on one side. A secret door should feel smooth and balanced, not like a disguised problem waiting to drag on the floor.
Make the Seams Work for You
Every secret door has seams. The trick is not always to eliminate them, but to place them where they look natural. Wall paneling, trim grids, vertical slats, wallpaper patterns, and shadow lines can all help disguise the opening. A seam that looks suspicious on a plain wall may disappear when it lines up with a decorative molding layout.
For a beginner project, design the wall treatment first, then hide the door inside that pattern. For example, if you create a simple board-and-batten wall, the vertical battens can cover or distract from the door edges. If you use a slat wall, the repeated vertical lines make the actual door gap harder to notice. If you paint the door and wall the same color with a matte or eggshell finish, the surface becomes quieter and less reflective, which helps the illusion.
The Beginner Installation Process
A simple secret door installation begins by removing the existing door and evaluating the frame. If the frame is solid and square enough, you may be able to reuse it. If not, you may need to add blocking, adjust the jamb, or create a cleaner mounting surface for the hinges. Beginners should take their time here because the frame determines how well the door moves. Once the door face is prepared, mount the hinges according to the hardware instructions and test the swing before adding final decorative pieces. This step matters because extra trim, slats, mirrors, or paneling can change weight and clearance. Dry-fit everything first. Open and close the door several times. Check the top, bottom, latch side, and hinge side. Make small adjustments before painting or caulking. The final finish should come after the door works correctly, not before.
Finishing Makes the Secret Work
The finish is where a basic hidden door becomes convincing. Paint should match the surrounding wall, not just in color but also in sheen. A satin door on a matte wall may reveal itself under angled light. Wallpaper should continue across the door with careful pattern matching. Trim should line up across the wall and door so the eye reads one continuous design.
Caulk can help soften gaps between trim and panels, but do not caulk the moving reveal around the door. The door needs room to operate. Instead, use planned shadow lines, narrow trim, or repeated wall details to make the reveal look intentional. If the door includes a touch latch, test it after painting because paint thickness and final alignment can affect how the latch catches. A beautiful secret door should not require a shoulder shove every time you open it.
Best Rooms for a Beginner Secret Door
A pantry secret door is one of the most practical beginner projects because it hides everyday storage while making the kitchen feel cleaner. A closet secret door can turn a hallway into a more polished space. A home office secret door can create privacy without adding visual clutter. A playroom secret door can feel magical for kids while still being simple and safe.
Storage rooms, reading nooks, craft rooms, and media closets are also excellent candidates. These spaces benefit from concealment but do not usually require complex locking systems. For a first project, choose a room where the door will be used regularly enough to enjoy, but not so constantly that tiny imperfections become annoying. A secret door should add delight to a home, not become a daily obstacle.
Common Beginner Mistakes to Avoid
The most common mistake is making the door too heavy. A bookshelf door loaded with real books may sound exciting, but it can become difficult to support without specialized hardware. Another common mistake is ignoring swing clearance. A beautiful hidden panel that hits the floor, baseboard, light switch, or nearby furniture will quickly become frustrating.
Beginners also tend to focus too much on the “secret” and not enough on the “door.” The door must open, close, latch, and release safely. It should not trap someone inside, block airflow where ventilation is needed, or hide access that emergency responders may need to find. Keep the first version simple. Once you understand alignment, hinges, reveals, and finishes, you can move into more advanced designs.
How Much Does a Beginner Secret Door Cost?
A simple DIY secret door can be surprisingly affordable if you reuse an existing opening and choose lightweight materials. A basic paint-matched panel door may require a door slab or plywood, hinges, latch hardware, trim, paint, screws, and basic tools. Costs rise when you add custom cabinetry, premium concealed hinges, mirrors, hardwood slats, smart locks, lighting, or professional carpentry. The smartest budget strategy is to spend money on hardware and straight materials rather than decorative complexity. Good hinges, a reliable latch, and flat panels will make the door feel better every day. Expensive finishes cannot compensate for a door that sags or scrapes. For beginners, a clean, simple secret door that works smoothly is more impressive than a dramatic design that feels fragile.
Safety, Access, and Practical Planning
A secret door should never create confusion in an emergency. If the hidden space is regularly occupied, make sure the door opens easily from the inside. If the door hides a utility area, electrical panel, water shutoff, or mechanical equipment, keep access practical. Concealed does not mean inaccessible. In some cases, a hidden door can be discreet to guests while still obvious enough for household members.
Local building codes may apply if you alter structural framing, required exits, fire separations, stair access, or garage entries. For a simple closet, pantry, or decorative interior door, the project is usually more straightforward, but it is still wise to think carefully. The best beginner secret door feels clever, safe, and natural in the home. It should make the space better, not harder to use.
The Easiest DIY Secret Door Plan
For most beginners, the easiest plan is a paint-matched flush panel door inside an existing doorway. Use lightweight material, adjustable hinges, a push latch or magnetic catch, and a wall treatment that helps disguise the seams. Build the design around clean lines rather than complicated mechanics. Keep the surface simple, the hardware reliable, and the opening safe from both sides.
This kind of secret door can turn an ordinary closet or pantry into one of the most memorable features in the house. It offers the thrill of a hidden room without requiring advanced carpentry. The result is practical, stylish, and surprisingly achievable. A beginner secret door is not about creating the perfect illusion on the first try. It is about learning how small details, careful measurements, and smart finishes can transform an everyday doorway into something unforgettable.
Final Thoughts
The easiest DIY secret door for beginners is the one that respects your tools, your space, and your skill level. Start with an existing interior doorway. Choose a light door face. Use dependable hardware. Hide seams with paint, trim, slats, or wall panels. Test the swing before finishing. Above all, make sure the door remains safe, usable, and easy to open from both sides. A secret door does not need to be mysterious to be impressive. Sometimes the best version is quiet, clean, and almost invisible until someone discovers it. That moment of surprise is what makes the project special. With a simple plan and patient installation, even a first-time DIYer can build a secret door that feels custom, clever, and completely worth the effort.


