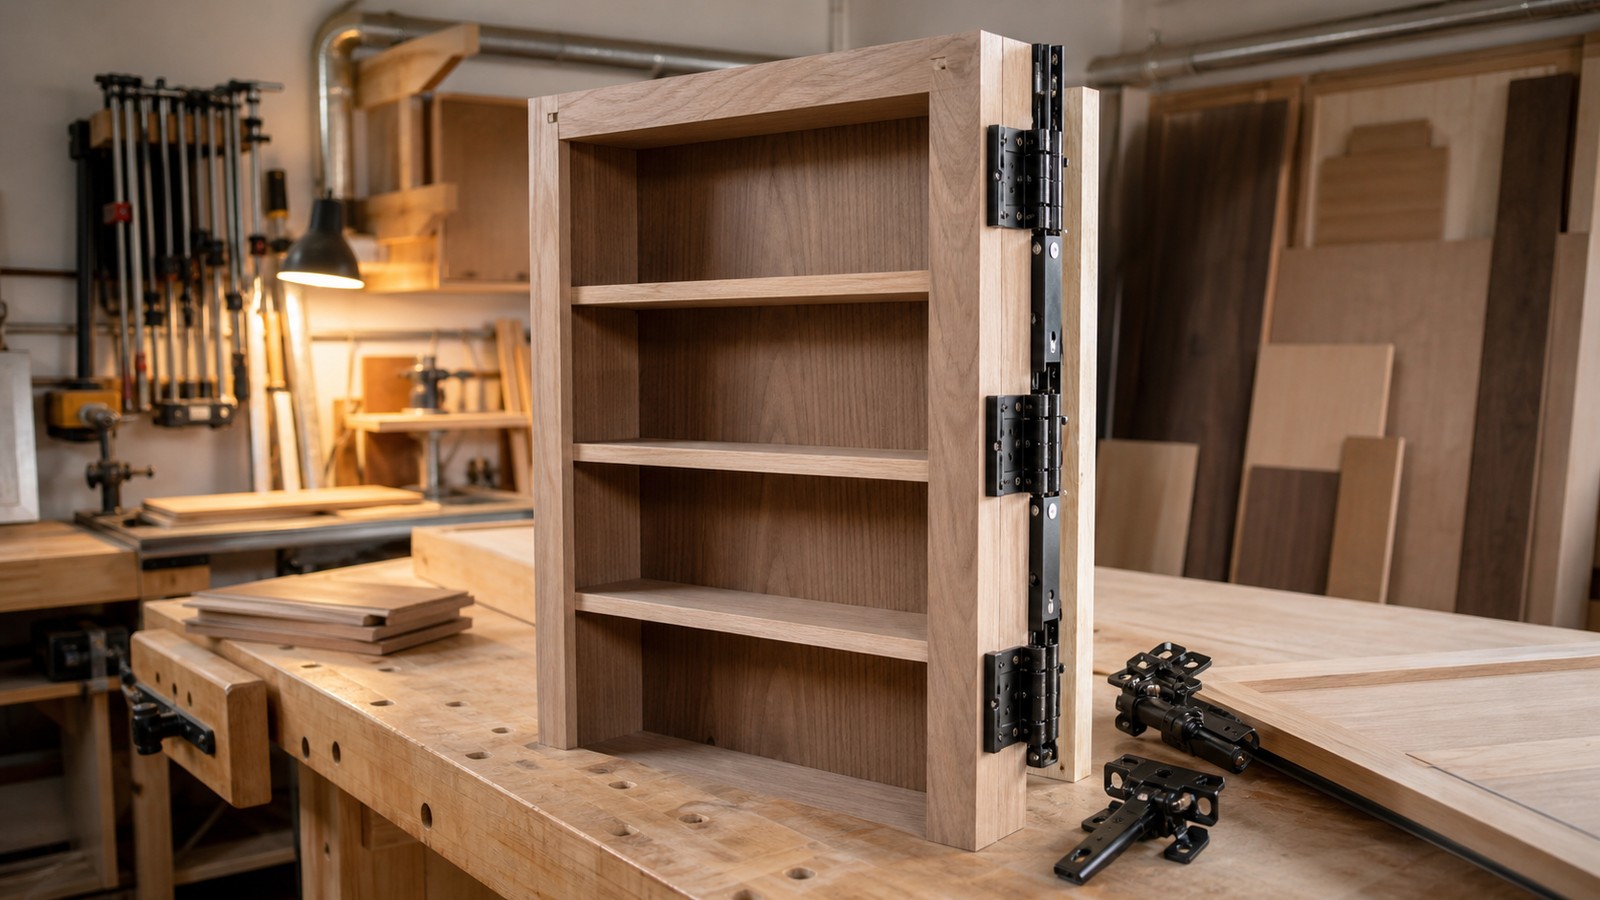
Build the Door for Year Two, Not Just Day One
A hidden door can look impressive on installation day and still fail if the carpentry is weak. Sagging shelves, rubbing edges, loose hinges, swollen panels, and rattling latches quickly turn a clever feature into a repair project. Long-lasting hidden doors are built with the same seriousness as good cabinetry and good doors: square openings, stable materials, rated hardware, protected edges, clean reveals, and planned adjustment. The secret is not only in the disguise. It is in the structure that lets the disguise keep working.
A: Stable structure, proper hardware, clean reveals, and maintainable finishes matter most.
A: They often sag because hardware was not sized for the finished weight.
A: Sometimes for light-duty designs, but stronger cores usually perform better.
A: Use a gap that blends visually while leaving room for seasonal movement and finish buildup.
A: Fit and adjust first, then finish and complete final tuning.
A: The latch edge and pull area usually show wear first.
A: Yes, hinges, latches, reveals, and finishes should be checked periodically.
A: Yes, but framing and floor irregularities must be measured honestly.
A: Hardware rated for the actual load and supported by framing is safest.
A: Build a reliable door first and let the disguise follow the structure.
Start With a Square Opening
A hidden door asks more from the opening than a standard door because uneven reveals become part of the visual clue. Check the rough opening for plumb, level, square, and twist before building the door. Fix framing problems early rather than trying to hide them with finish material.
Older homes may have settled floors and walls. That does not make a hidden door impossible, but it does mean the design should account for real conditions. A slightly wider shadow line may be better than a tight reveal that rubs every season.
Measure diagonals, not only width and height. If the opening is out of square, the door may close at one corner and bind at another. Good carpentry begins with honest measurement.
It is also worth checking the wall around the opening, not just the opening itself. A bowed wall can make a hidden panel look proud even when the jamb is square. Straightening or floating the surrounding surface may be necessary if the design depends on a nearly invisible reveal.
Use a Stable Door Core
The face of a hidden door can be decorative, but the core should be stable. Solid-core slabs, engineered panels, torsion boxes, plywood structures, or well-built cabinet frames can all work depending on the design. Avoid weak panels that flex under hardware loads.
Stability matters because hidden doors often carry extra weight from shelves, mirrors, paneling, or trim. If the core moves, the reveal changes. Once the reveal changes, the secret becomes easier to spot.
The core should also match the hardware method. Concealed hinges may need thickness and screw-holding power. A pivoting bookcase may need a frame that resists racking. A mirror door may need backing that keeps the reflective surface from twisting. The hidden face can vary, but the internal structure has to suit the movement.
Size Hardware for the Finished Load
Hardware should be chosen after calculating the finished door weight. A bookcase door loaded with books, a mirror door, or a paneled wall section may weigh far more than a plain slab. Hinges, pivots, tracks, casters, and fasteners all need to match that real load.
Undersized hardware may work briefly and then sag. Sagging creates rub marks, latch problems, uneven gaps, and stress on the frame. A long-lasting hidden door uses hardware with enough capacity and adjustability.
Fasteners need real structure behind them. Screws into weak trim or unsupported drywall are not enough for a moving hidden door. Add blocking, framing, or structural backing where the hardware needs strength.
Think about service access too. If hardware can never be adjusted without tearing apart the disguise, small problems become large repairs.
Plan Reveals With Movement in Mind
A tight reveal may look clean, but doors need room to move. Wood expands, floors shift, paint adds thickness, and hardware settles. The reveal should be narrow enough to disguise the opening but generous enough to prevent rubbing.
Test the door through its full swing before final finishing. Watch the hinge side, latch side, head, and floor. A hidden door often has thicker face material than a standard slab, which can change clearance unexpectedly.
Design the reveal as part of the disguise. Align it with panel joints, shelf lines, wallpaper seams, or shadow gaps so it looks intentional rather than accidental.
Protect High-Touch Edges
The latch edge and pull area receive the most wear. Protect them with solid edging, durable finish, discreet hardware, or a touch point that makes sense. A hidden door that relies on people grabbing a fragile painted corner will age poorly.
Edges should be straight, sealed, and comfortable. Splinters, sharp corners, and raw composite material make the door feel unfinished. They also reveal the opening when damage begins.
Think about how the door will be used when someone’s hands are full. If the only way to open it is to press on a delicate edge, the finish will suffer. A small groove, protected pull, or concealed latch point can guide the hand to a durable area without making the whole opening obvious.
Edge protection should be decided before final finishing. Adding a pull or trim after paint, veneer, or wallpaper is complete can leave exposed cuts and awkward touch-ups. A long-lasting hidden door treats the hand contact area as part of the design from the beginning.
This is also where user habits matter. A door used by children or guests may need a clearer, tougher touch point than a private door used by one careful homeowner. Durability should match the roughest normal use, not the ideal use.
Make the Latch Reliable
A hidden door needs a latch that closes consistently without slamming. Magnetic catches, roller latches, mechanical latches, touch releases, or concealed locks can work, but each has limits. Choose the latch based on door weight, use frequency, and room purpose.
Latch alignment should be adjustable. Seasonal movement or small settling can make a fixed latch unreliable. If the door protects a private room or storage area, reliability matters more than a perfect invisible release.
Listen to the latch during testing. Clicking, rattling, scraping, or bouncing suggests the door needs tuning. Sound can reveal a hidden door as quickly as a visible seam.
For heavier doors, the latch should not be asked to pull the door into alignment. The hinges and frame should already hold the slab where it belongs. The latch’s job is to secure the final position, not to fight a twisted panel every time the door closes.
Do Not Let Finish Hide Bad Fit
Paint, wallpaper, veneer, and trim can soften a hidden door, but they cannot fix poor carpentry. If the slab is twisted or the frame is out of square, finish work may only disguise the problem for a short time.
Fit the door mechanically before making it beautiful. It should swing, close, latch, and clear the floor in its unfinished state. Then the finish can refine the disguise instead of compensating for errors.
This sequence protects the finish too. Repeated planing, sanding, and hinge adjustment after final paint can leave scars that are difficult to hide.
Builders should be willing to stop before finish work if the movement is not right. It is tempting to keep going because the exciting visual stage is near, but hidden doors punish impatience. Once wallpaper, veneer, or paint is complete, every correction becomes more visible and more expensive.
A good test is to operate the unfinished door for several days if the schedule allows. Daily use reveals a latch that is too stiff, a hinge that creaks, or a corner that barely grazes the floor.
Control Moisture and Temperature
Hidden doors near bathrooms, garages, basements, laundry rooms, or exterior walls face more movement than doors in dry interior spaces. Material choice and finish should respond to those conditions. Seal all sides of vulnerable wood, not only the visible face.
Ventilation can matter in hidden rooms. A concealed storage area that traps humidity may affect the door from the back side. Think about the conditions on both faces of the panel.
Build Access for Adjustment
Every hidden door should be adjustable after installation. Hinges may need tightening, latches may need repositioning, and shelves may need load changes. If adjustment points are buried behind fixed trim, maintenance becomes frustrating.
Plan removable panels, accessible screws, or hardware locations that can be reached discreetly. A hidden door is a moving assembly, not a sealed sculpture.
Keep records of hinge model, latch type, finish products, and installation notes. Future repairs are easier when the next person understands how the door was built.
Test With Real Use
Testing should include ordinary behavior. Open the door with one hand, while carrying items, from the hidden side, and after loading any shelves. Close it gently and firmly. See whether the latch catches every time.
If children or guests will use the door, test for intuitive operation. A door that only the builder can operate smoothly is not finished. Hidden should not mean inconvenient.
Finish for Repairability
Long-lasting hidden doors need finishes that can be touched up. A delicate specialty finish may look beautiful until the latch edge chips. Consider how the surface will be cleaned, repaired, and refreshed over time.
Save paint formulas, wallpaper scraps, veneer offcuts, and trim profiles. The more custom the disguise, the more valuable spare material becomes. Repairability keeps the secret looking intentional rather than worn out.
Durability is part of the aesthetic. A hidden door that still aligns, latches, and blends after years of use feels more impressive than one that was perfect for a week.
Choose finishes with the next repair in mind. A paint color that can be matched, a clear coat that can be renewed, or a panel system with removable parts will make the door less intimidating to maintain. Hidden doors fail faster when owners are afraid to touch them.
Good Carpentry Keeps the Secret
The best hidden doors are satisfying because they feel effortless. That effortlessness comes from careful carpentry: a straight opening, a stable core, hardware with capacity, a clean reveal, a reliable latch, and a finish that can handle touch.
Build those fundamentals first. The disguise can be rustic, modern, traditional, or playful, but it will last only if the door underneath is strong. Good carpentry is what lets the secret stay quiet. It also gives the homeowner confidence to use the door normally instead of treating it like a fragile showpiece. A hidden door that can be opened daily without worry will always feel better than one everyone is afraid to touch.
That strength is often invisible, which makes it easy to undervalue. Blocking hidden inside the wall, a flat core, a better hinge, or a serviceable latch may not impress guests immediately. Those choices are what keep the door impressive after years of ordinary use. The craft is not only what people see in the reveal; it is what they feel when the door moves smoothly, closes softly, and returns to the same position every time. Hidden doors reward patience because small carpentry decisions compound into long-term reliability, and reliability is what keeps the illusion from becoming a maintenance burden. The hidden work is the difference between a feature people admire once and a door the household enjoys using for years. A careful builder treats that invisible work as the main event. That mindset keeps the project grounded when decorative decisions start to compete for attention, and it helps every finish choice serve the door’s long-term movement.